Getting Started with the API
Welcome to the Lunch Money developer API! This API has enabled the Lunch Money user community to build a broad set of tools and plug-ins to complement their Lunch Money experience and help other users. This guide will help you get started using the Lunch Money API.
Most users interact with their Lunch Money data using the official web or mobile app. Making API calls is another way to interact with your Lunch Money data. You can make API calls that get your data for you, allowing you to do other things with it, like generating your own charts or simply archiving your data. You can also make API calls that change or delete your data. Any changes you make are permanent, just like they would be if you made changes using the web or mobile app.
Always use a test budget when getting started.
Create a Test Budgeting Account
Since changes to your data made by the API are permanent, the best way to begin interacting with the API is to create a new test budgeting account in your existing Lunch Money account. As you start using the API, you can interact with this test account and ensure that your real data is not modified.
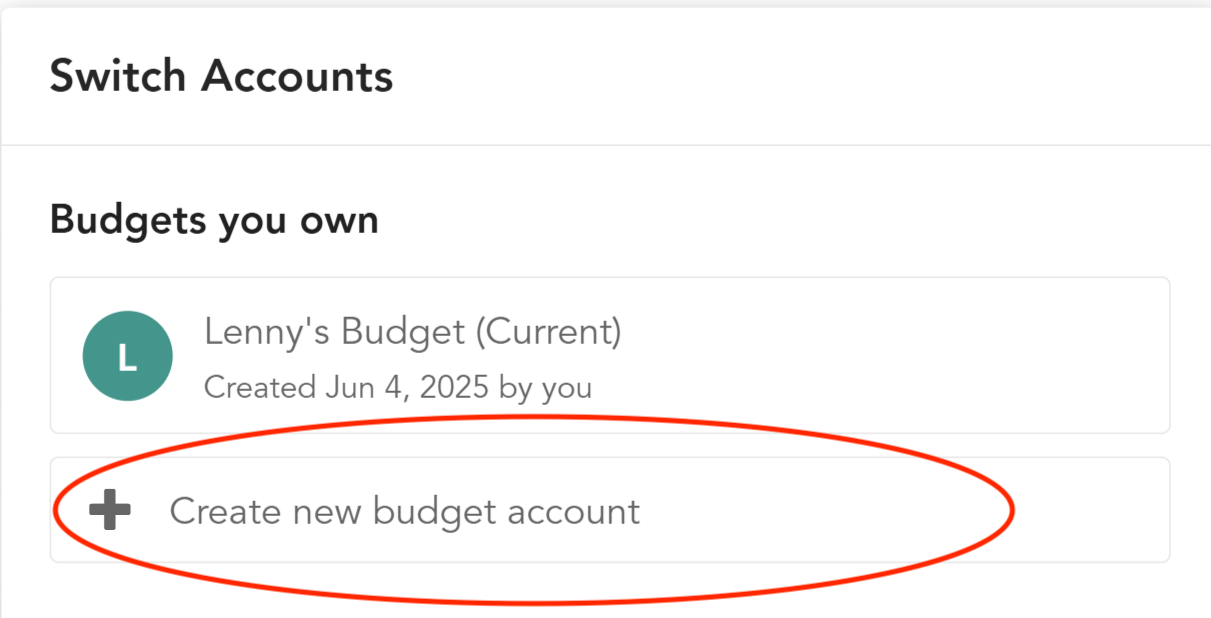
Click on the green circle in the upper right hand corner in the Lunch Money Web App

Click on the "Create a New Budget Account" link and give your new budget a name like "API Test Budget"
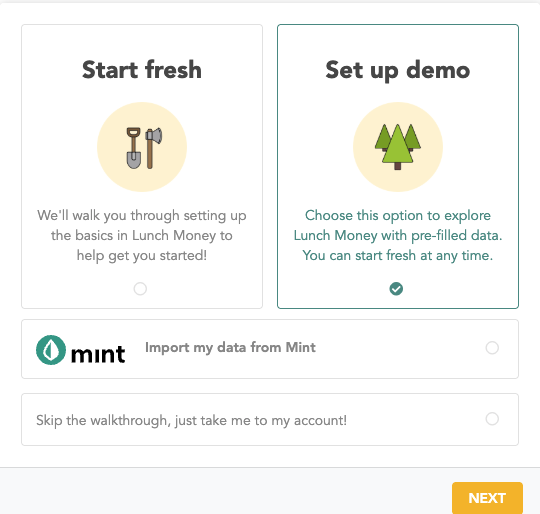
Choose the option to "Set up Demo". This will add categories, accounts, tags and several months worth of transactions to your new budget.
Getting an access token
Lunch Money API requests are authenticated using the Bearer Token authentication method. In plain English, this means that you will pass a token associated with your budgeting account to Lunch Money. This is so we know which account to operate on and that the request came from someone who can access that account.
Navigate to the developers page in the Lunch Money web app. Look at the green circle in the upper right hand corner and make sure that it is showing the test account that you just created. If you aren't sure which account is active, you can click on the green circle to bring up the "Switch Accounts" dialog. This will show you the full names of all the accounts associated with your account. Select the test budgeting account you created.
In the upper right hand corner of the page, give your access token a label and specify what you are using it for. When you're done, hit the "Request Access Token" button.
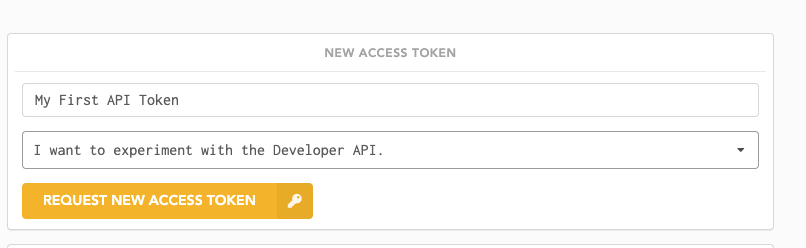
After you do this, the web page will show you a long alphanumeric string. This is your access token. Hit the copy button and save this token somewhere safe. It is only shown to you when you create it.
Congratulations! You've got an access token and are ready to make an API request! Later, when you are more comfortable with the API, you can repeat this process to create a new access token associated with your real budget.
Don't share them with anyone that you don't trust.
If you ever worry that your access token has been compromised, you can always come back to the Developers page and hit the Revoke button.
Using your access token
When you start to write code that makes API calls, you will need to include this token in each request using an Authorization header. Here is an example curl request:
curl --location 'https://api.lunchmoney.dev/v2/me' \
--header 'Authorization: Bearer <YOUR_ACCESS_TOKEN>'
If this doesn't make sense yet, that's OK!
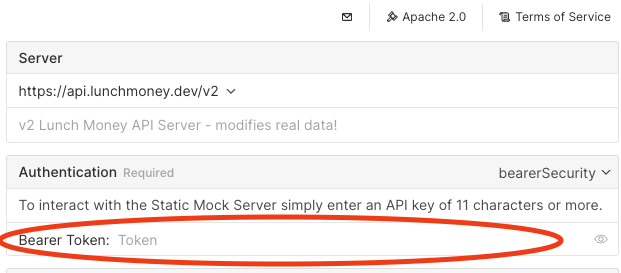
There is an easier way to use your access token to make requests. Head over to the API Reference Documentation.
Paste your new token into the box that says "Bearer Token" in the server configuration in the upper right hand corner.
Scroll down to the section called "Get Current User" and hit the "Test Request" button.
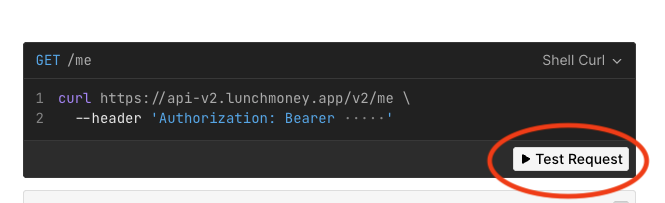
This will pop up a dialog box that you can use to send an API request. This is a simple endpoint, so just hit the "Send" button. You should see a response that includes your name and the name of your test budget.
From here, you can explore the rest of the Lunch Money API and start thinking about what you might do with it.
I still need help!
If you still aren't sure how to get started, we have other resources to help.
A great way to find get unstuck is to join the Lunch Money community on Discord and send a question in the Developer API Channel.
You can also email our developer advocate to get help as well.